
Get Houtini LM running in 5 minutes. This guide covers everything you need: Node.js, LM Studio, and Claude Desktop integration. You'll be analysing code locally before your next coffee break.
What You're Building
By the end of this setup, you'll have a powerful local AI development environment that saves you money and gives you unlimited code analysis. Here's what we'll install:
Node.js
JavaScript runtime for Houtini LM
Houtini LM
Your local AI analysis toolkit
LM Studio
Local AI model hosting
Claude Desktop
Your AI development partner
Total Time: 5 Minutes
Most of this is downloading - perfect time to grab a coffee while LM Studio downloads your model.
Prerequisites
Before we start, make sure you have:
Modern Computer
Windows: Windows 10+ with AVX2 support, 4GB+ GPU VRAM recommended
macOS: Apple Silicon (M1/M2/M3/M4), macOS 13.4+
Linux: Ubuntu 20.04+, x64 with AVX2 support
RAM: 16GB+ recommended (8GB minimum for smaller models)

Desktop Commander MCP
Essential companion tool for file operations and local development workflows. Handles reading, writing, and managing your project files.
Get Desktop CommanderAdministrator Access
To install Node.js and LM Studio on your machine.

LM Studio
The local LLM runtime that powers Houtini's unlimited analysis and generation. Runs powerful models privately on your machine.
Download LM StudioStep 1: Install Node.js
Node.js powers Houtini LM. If you already have Node.js installed, you can skip to the next step.
Windows Installation
Download and install the Windows installer from the official Node.js website:
Download Node.js
Visit nodejs.org and download the "LTS" version (recommended for most users).
Download Node.jsRun the Installer
Run the downloaded .msi file and follow the installation wizard. Keep all default options selected.
Verify Installation
Open Command Prompt or PowerShell and verify Node.js is installed:
node --versionYou should see something like v20.11.0 or similar.
macOS Installation
Download and install the macOS installer from the official Node.js website:
Run the Installer
Run the downloaded .pkg file and follow the installation wizard. Keep all default options selected.
Verify Installation
Open Terminal and verify Node.js is installed:
node --versionYou should see something like v20.11.0 or similar.
Linux Installation
Install Node.js using your distribution's package manager or from the official website:
curl -fsSL https://deb.nodesource.com/setup_lts.x | sudo -E bash -
sudo apt-get install -y nodejscurl -fsSL https://rpm.nodesource.com/setup_lts.x | sudo bash -
sudo yum install -y nodejsStep 2: Install Houtini LM
Now let's install Houtini LM via npm. This gives you access to all the powerful analysis functions.
Install Houtini LM Package
Open your terminal or command prompt and run:
npm install -g @houtini/lm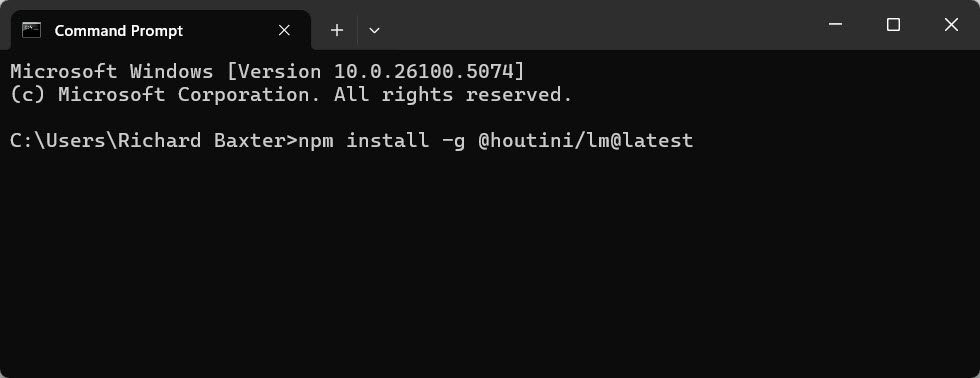
NPM installing Houtini LM and its dependencies
Verify Installation
Check that Houtini LM installed correctly:
houtini-lm --versionYou should see the current version number displayed.
Permission Issues on Mac/Linux?
If you get permission errors, you might need to use sudo npm install -g @houtini/lm or set up npm to install packages globally without sudo.
Step 3: Install LM Studio
LM Studio hosts the local AI models that power Houtini LM's analysis functions. It's free and runs entirely on your machine.
Download LM Studio
Visit the LM Studio website and download the installer for your operating system:
Download LM Studio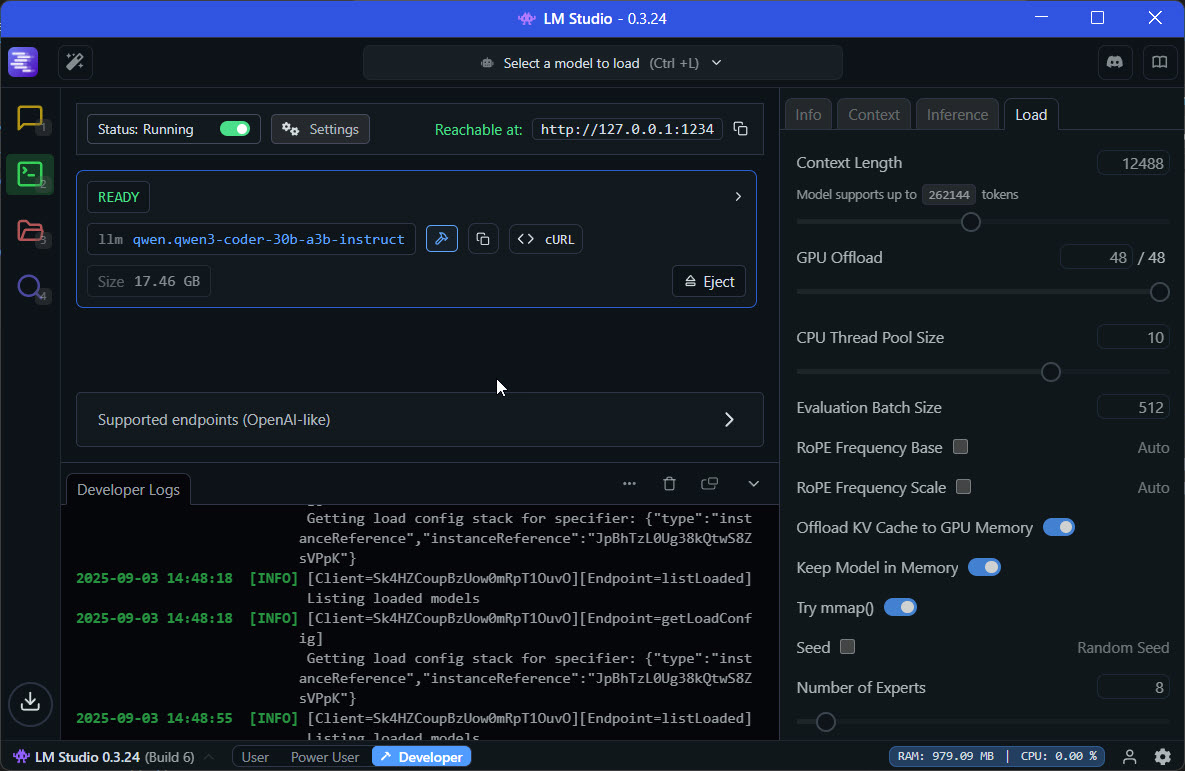
LM Studio's clean interface for managing local AI models
Install LM Studio
Run the downloaded installer and follow the installation wizard. It's straightforward - just keep the default options.
Download a Model (Our Favourite)
Launch LM Studio and download our recommended model:
Qwen2.5-Coder-32B-Instruct (Recommended)
Our absolute favourite for code analysis. Brilliant at understanding complex codebases and providing practical insights.
In LM Studio, search for "Qwen2.5-Coder-32B" and download the GGUF version. It's large but worth the wait!
Load the Model
Once downloaded, click "Load Model" in LM Studio and select your Qwen2.5-Coder model. Make sure the local server is running on port 1234.
Coffee Break Time!
The Qwen2.5-Coder model is ~20GB, so this is perfect time for a coffee break. The download runs in the background whilst you can continue with other work.
Step 4: Configure Claude Desktop
The final step is adding Houtini LM to your Claude Desktop configuration so you can use it directly in your conversations.
Windows Configuration
Add Houtini LM to your Claude Desktop configuration file:
Open Configuration File
Navigate to %APPDATA%\Claude\claude_desktop_config.json and open it in your text editor.
Add Houtini LM Configuration
Add this JSON configuration to your claude_desktop_config.json file:
{
  "mcpServers": {
    "houtini-lm": {
      "command": "houtini-lm",
      "args": [],
      "env": {
        "LLM_MCP_ALLOWED_DIRS": "C:\\dev,C:\\projects,C:\\work"
      }
    }
  }
}
macOS Configuration
Add Houtini LM to your Claude Desktop configuration file:
Open Configuration File
Navigate to ~/Library/Application Support/Claude/claude_desktop_config.json and open it in your text editor.
Add Houtini LM Configuration
Add this JSON configuration to your claude_desktop_config.json file:
{
  "mcpServers": {
    "houtini-lm": {
      "command": "houtini-lm",
      "args": [],
      "env": {
        "LLM_MCP_ALLOWED_DIRS": "/Users/yourusername/dev,/Users/yourusername/projects"
      }
    }
  }
}
Replace "yourusername" with your actual macOS username.
Linux Configuration
Add Houtini LM to your Claude Desktop configuration file:
Open Configuration File
Navigate to ~/.config/Claude/claude_desktop_config.json and open it in your text editor.
Add Houtini LM Configuration
Add this JSON configuration to your claude_desktop_config.json file:
{
  "mcpServers": {
    "houtini-lm": {
      "command": "houtini-lm",
      "args": [],
      "env": {
        "LLM_MCP_ALLOWED_DIRS": "/home/yourusername/dev,/home/yourusername/projects"
      }
    }
  }
}
Replace "yourusername" with your actual Linux username.
Important: Set Your Allowed Directories
Change the LLM_MCP_ALLOWED_DIRS paths to match your actual project directories. Houtini LM can only access files within these specified directories for security.
Step 5: Restart Claude Desktop
The final step - restart Claude Desktop to load your new configuration:
Close Claude Desktop
Completely quit Claude Desktop (not just minimize - actually quit the application).
Restart Claude Desktop
Launch Claude Desktop again. It will load your new Houtini LM configuration.
Verify Everything Works
Let's make sure your setup is working perfectly. Try these quick tests in Claude Desktop:
Test 1: Health Check
In Claude Desktop, type: houtini-lm:health_check
Expected: You should see connection status and model information.
Test 2: List Functions
Try: houtini-lm:list_functions
Expected: You should see all available Houtini LM functions.
Test 3: Analyse a File
Try: Use houtini-lm to analyse this file: [path to any code file]
Expected: You should get detailed code analysis and insights.
🎉 You're All Set!
If all tests pass, congratulations! You now have unlimited local AI code analysis. Start with analysing a single file to see what Houtini LM can do.
Troubleshooting
Hit a snag? Here are solutions to the most common setup issues:
Houtini LM functions not showing up in Claude Desktop
Claude Desktop isn't recognising the Houtini LM MCP server.
- Check your JSON syntax in claude_desktop_config.json - even a missing comma breaks everything
- Ensure you've completely restarted Claude Desktop (quit and relaunch)
- Verify the houtini-lm command works in terminal:
houtini-lm --version - Check that Node.js is in your PATH by running
node --version
LM Studio connection errors
Houtini LM can't connect to LM Studio for local model hosting.
- Ensure LM Studio is running and has a model loaded
- Check that LM Studio's local server is running on port 1234
- Try restarting LM Studio and reloading your model
- In LM Studio settings, ensure "Local Server" is enabled
Permission denied errors on file analysis
Getting permission errors when trying to analyse files.
- Check that your file path is within the directories listed in LLM_MCP_ALLOWED_DIRS
- Use absolute paths:
C:\project\file.jsnot.\file.js - Ensure the file exists and you have read permissions
- Update LLM_MCP_ALLOWED_DIRS to include your project directories
npm install fails or permission errors
Can't install Houtini LM via npm due to permission issues.
- On Mac/Linux: Try
sudo npm install -g @houtini/lm - Better solution: Configure npm to install packages globally without sudo
- Check npm configuration:
npm config get prefix - Ensure you're using a recent version of Node.js (18+ recommended)
Model download is very slow or fails
The Qwen2.5-Coder model download is taking forever or failing.
- The model is ~20GB - downloads can take 30+ minutes on slower connections
- Try a smaller model first like "Qwen2.5-Coder-7B" for testing
- Ensure you have at least 25GB free disk space
- Try downloading during off-peak hours if your internet is slow