Quick Start Guide: Set Up Your Local AI Development Assistant
Ready to supercharge your development workflow? This guide will get you from zero to productive with Houtini LM in about 15 minutes. You’ll have unlimited AI code analysis running locally, saving your Claude context for the important strategic thinking.
What You’ll Achieve
By the end of this setup, you’ll have a powerful local AI development environment that saves you money and gives you unlimited code analysis capabilities:
- Unlimited code analysis: Review any amount of code without API costs
- Professional code reviews: Get insights comparable to senior developers
- Instant project insights: Understand codebases quickly with comprehensive analysis
- Claude context preservation: Save your Claude conversations for complex problem-solving
Prerequisites: What You Need
Hardware Requirements:
- Gaming PC or workstation with decent GPU (8GB+ VRAM recommended)
- 16GB+ RAM (32GB preferred for larger models)
- 50GB+ free storage space
Software Requirements:
- Windows 10/11, macOS, or Linux
- Claude Desktop (for the best experience)
- Node.js 18+ (for npm installation)
Step 1: Install LM Studio
LM Studio is your local AI engine that runs language models on your machine. It’s free and runs entirely offline.
- Download LM Studio from lmstudio.ai
- Install and open LM Studio
- Navigate to the “Discover” tab
- Search for and download one of these recommended models:
Recommended Models by Hardware:
- 8-12GB VRAM: Qwen2.5-Coder-14B-Instruct (excellent for code)
- 12-16GB VRAM: Qwen2.5-32B-Instruct (best balance)
- 16GB+ VRAM: Qwen2.5-72B-Instruct (maximum capability)
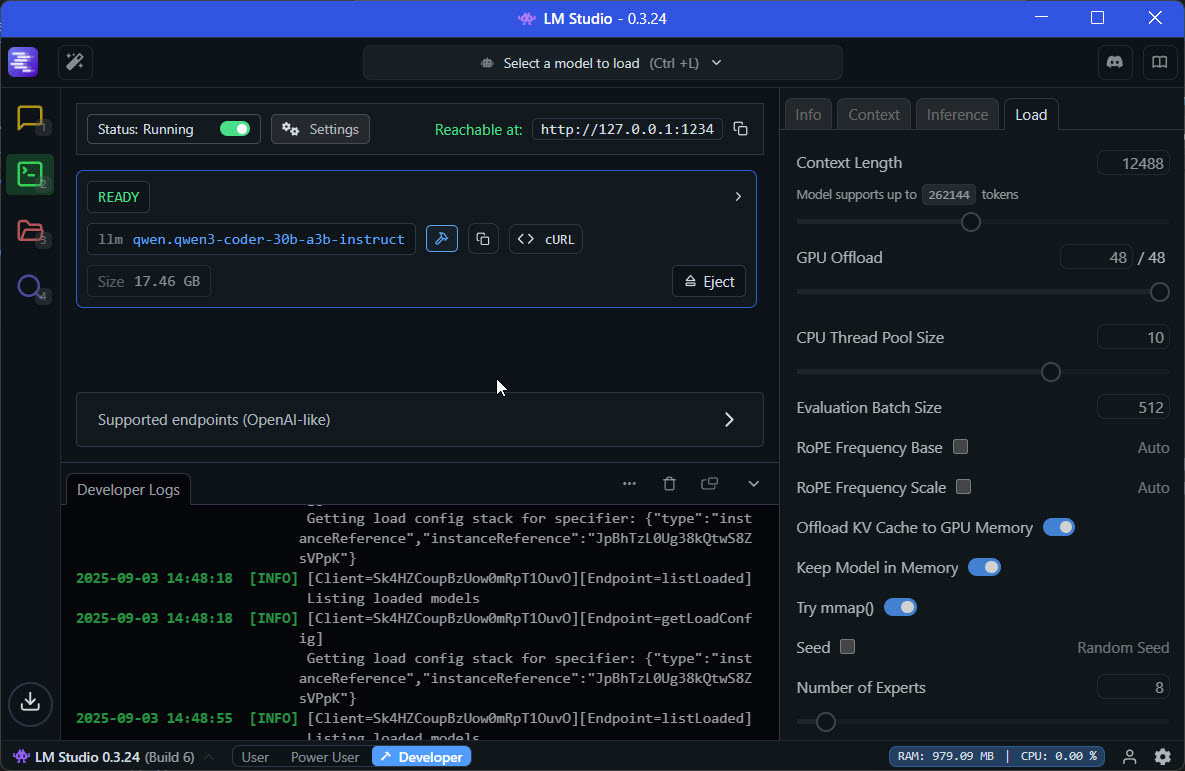
- Once downloaded, click “Load Model” in the chat interface
- Start the local server by clicking “Start Server” (default: localhost:1234)
Step 2: Install Houtini LM
Now we’ll install the Houtini LM MCP server that connects your local AI to Claude.
Open your terminal or command prompt and run:
npm install -g @houtini/lm
That’s it! The MCP server is now installed and ready to connect your local AI model to Claude.
Step 3: Configure Claude Desktop
For the best experience, configure Claude Desktop to use your local AI assistant. This gives you the perfect partnership: Houtini handles analysis, Claude handles strategy.
Windows Configuration
Add Houtini LM to your Claude Desktop configuration file:
Open Configuration File
Navigate to %APPDATA%\Claude\claude_desktop_config.json and open it in your text editor.
Add Houtini LM Configuration
Add this JSON configuration to your file:
macOS Configuration
Add Houtini LM to your Claude Desktop configuration file:
Open Configuration File
Navigate to ~/Library/Application Support/Claude/claude_desktop_config.json and open it in your text editor.
Add Configuration
Replace “yourusername” with your actual macOS username in the paths below.
Linux Configuration
Add Houtini LM to your Claude Desktop configuration file:
Open Configuration File
Navigate to ~/.config/Claude/claude_desktop_config.json and open it in your text editor.
Add Configuration
Replace “yourusername” with your actual Linux username in the paths below.
Configuration JSON for all platforms:
{
  "mcpServers": {
    "houtini-lm": {
      "command": "npx",
      "args": ["@houtini/lm"]
    },
    "desktop-commander": {
      "command": "npx",
      "args": ["@desktop-commander/mcp"]
    }
  }
}
Why Desktop Commander? This companion MCP handles file operations, so when Houtini LM generates code or suggests changes, Desktop Commander can write those files to your project. Perfect teamwork!
Step 4: Set Up Directory Access
For security, you need to tell Houtini LM which directories it can access. This keeps your system safe while giving it access to your development projects.
Windows Environment Variable
Set the environment variable in PowerShell or Command Prompt:
PowerShell (Recommended)
$env:LLM_MCP_ALLOWED_DIRS = "C:\\dev;C:\\projects;C:\\Users\\YourName\\Documents"
Command Prompt
set LLM_MCP_ALLOWED_DIRS=C:\\dev;C:\\projects;C:\\Users\\YourName\\Documents
macOS Environment Variable
Set the environment variable and make it permanent:
Current Session
export LLM_MCP_ALLOWED_DIRS="/Users/yourname/dev:/Users/yourname/projects"
Make Permanent
echo 'export LLM_MCP_ALLOWED_DIRS="/Users/yourname/dev:/Users/yourname/projects"' >> ~/.zshrc
Linux Environment Variable
Set the environment variable and make it permanent:
Current Session
export LLM_MCP_ALLOWED_DIRS="/home/yourname/dev:/home/yourname/projects"
Make Permanent
echo 'export LLM_MCP_ALLOWED_DIRS="/home/yourname/dev:/home/yourname/projects"' >> ~/.bashrc
Pro tip: Include all your development directories, separated by semicolons (Windows) or colons (macOS/Linux).
Step 5: Your First Commands
Now for the exciting part! Let’s test your setup with some real commands. Open Claude Desktop and try these:
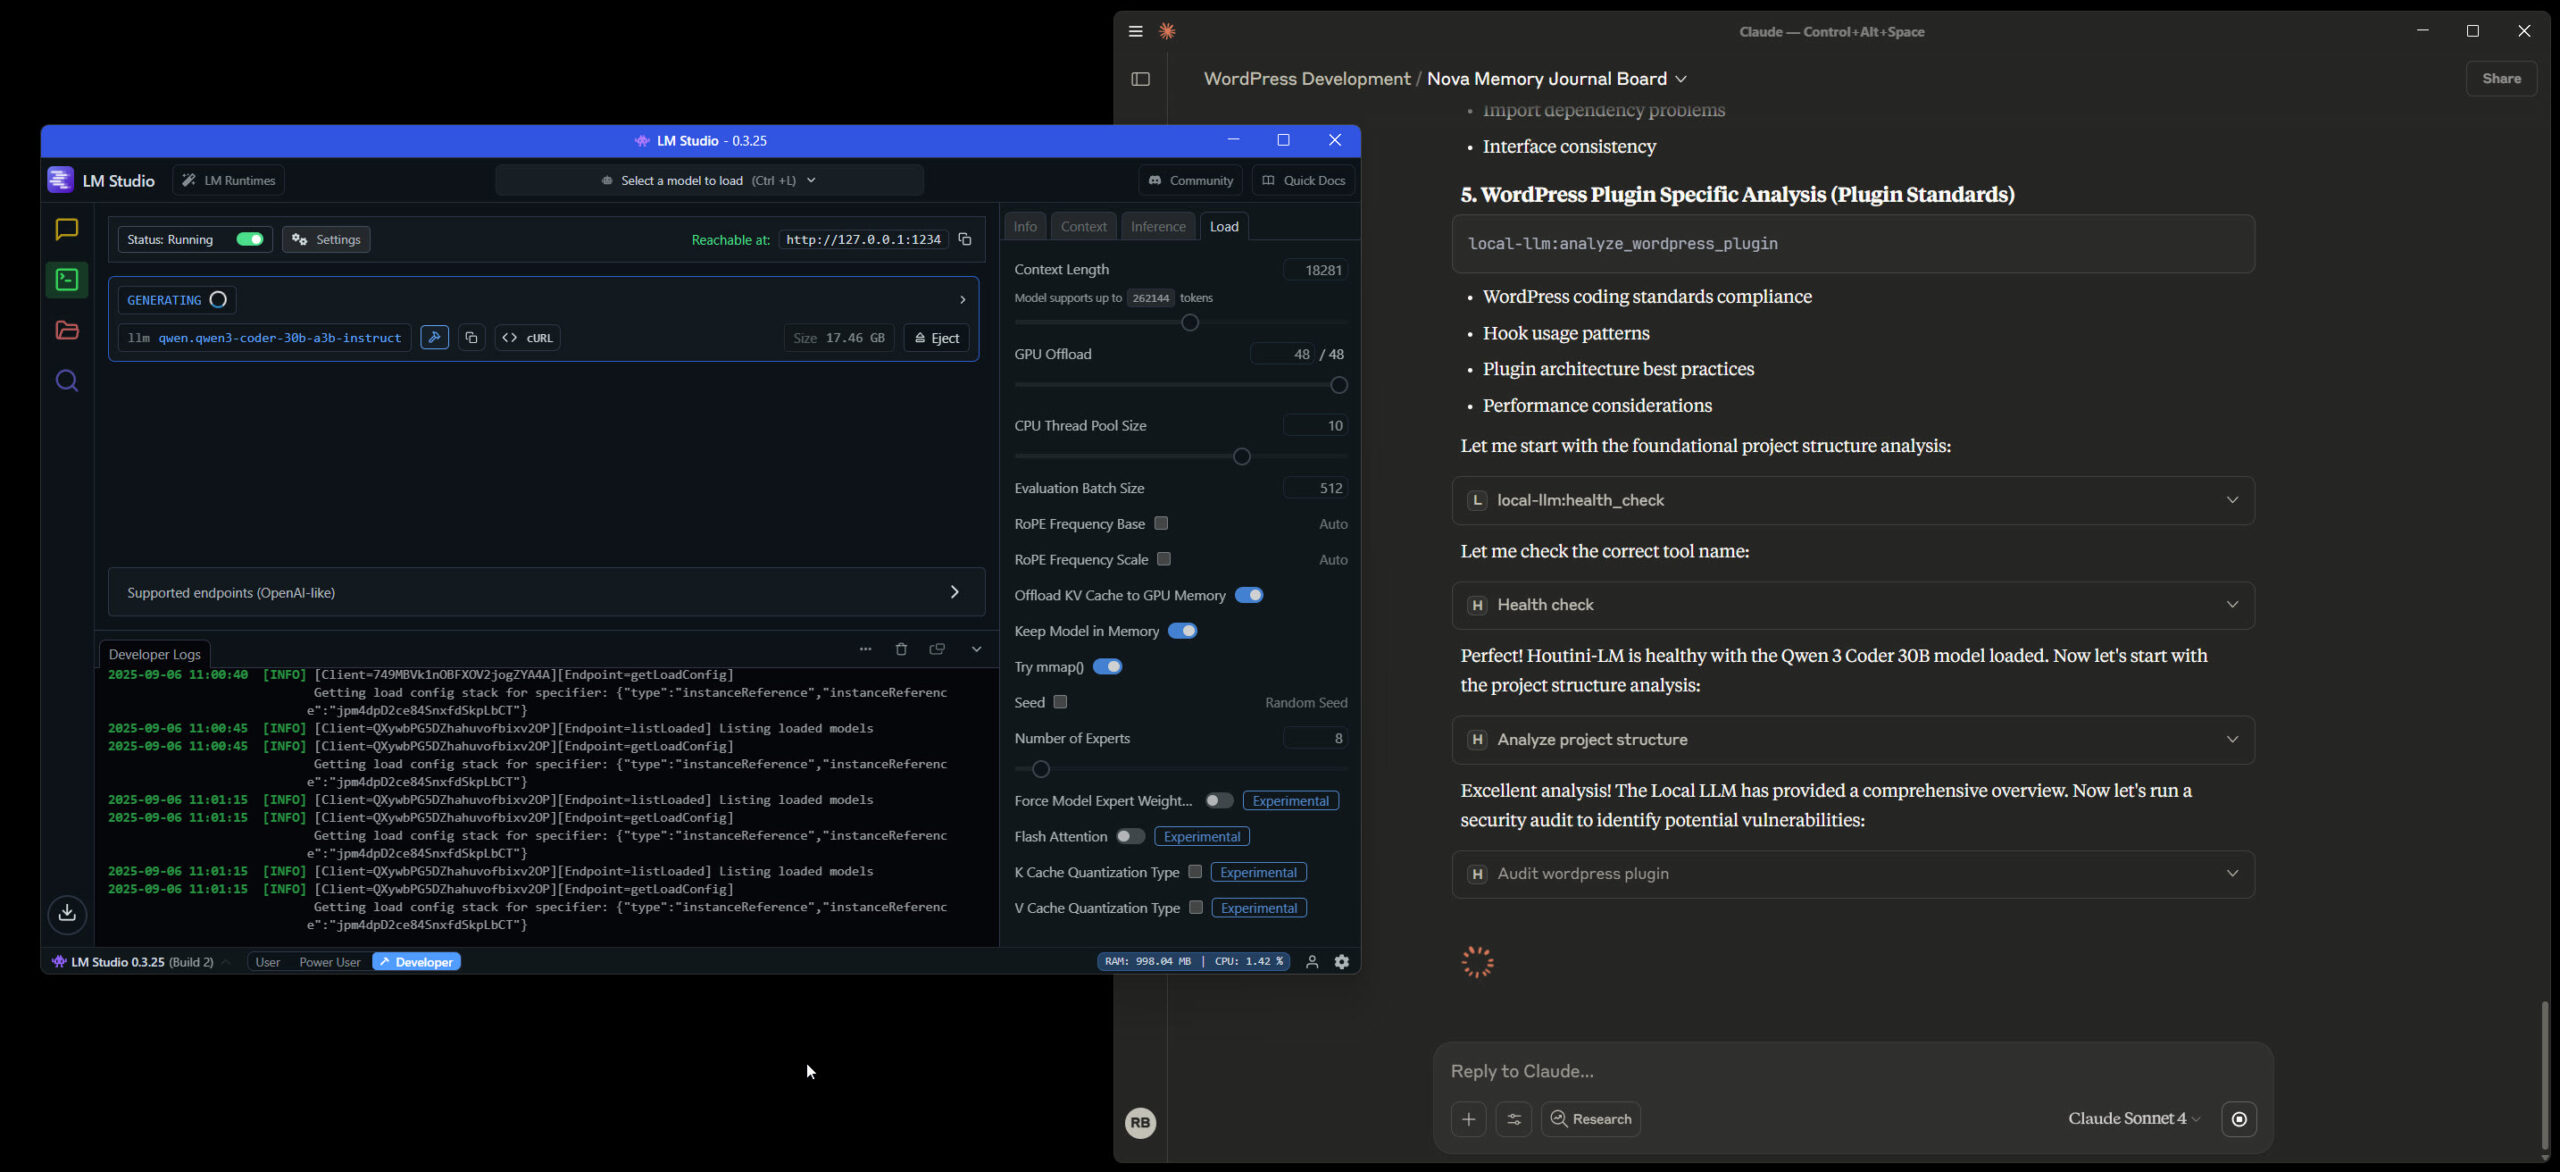
Verify Everything Works
local-llm:health_check detailed=trueThis confirms your LM Studio connection and model status.
Analyse a Project
local-llm:count_files projectPath="C:/your-project-directory" analysisDepth="detailed"Get a beautiful overview of your project structure with insights and statistics.
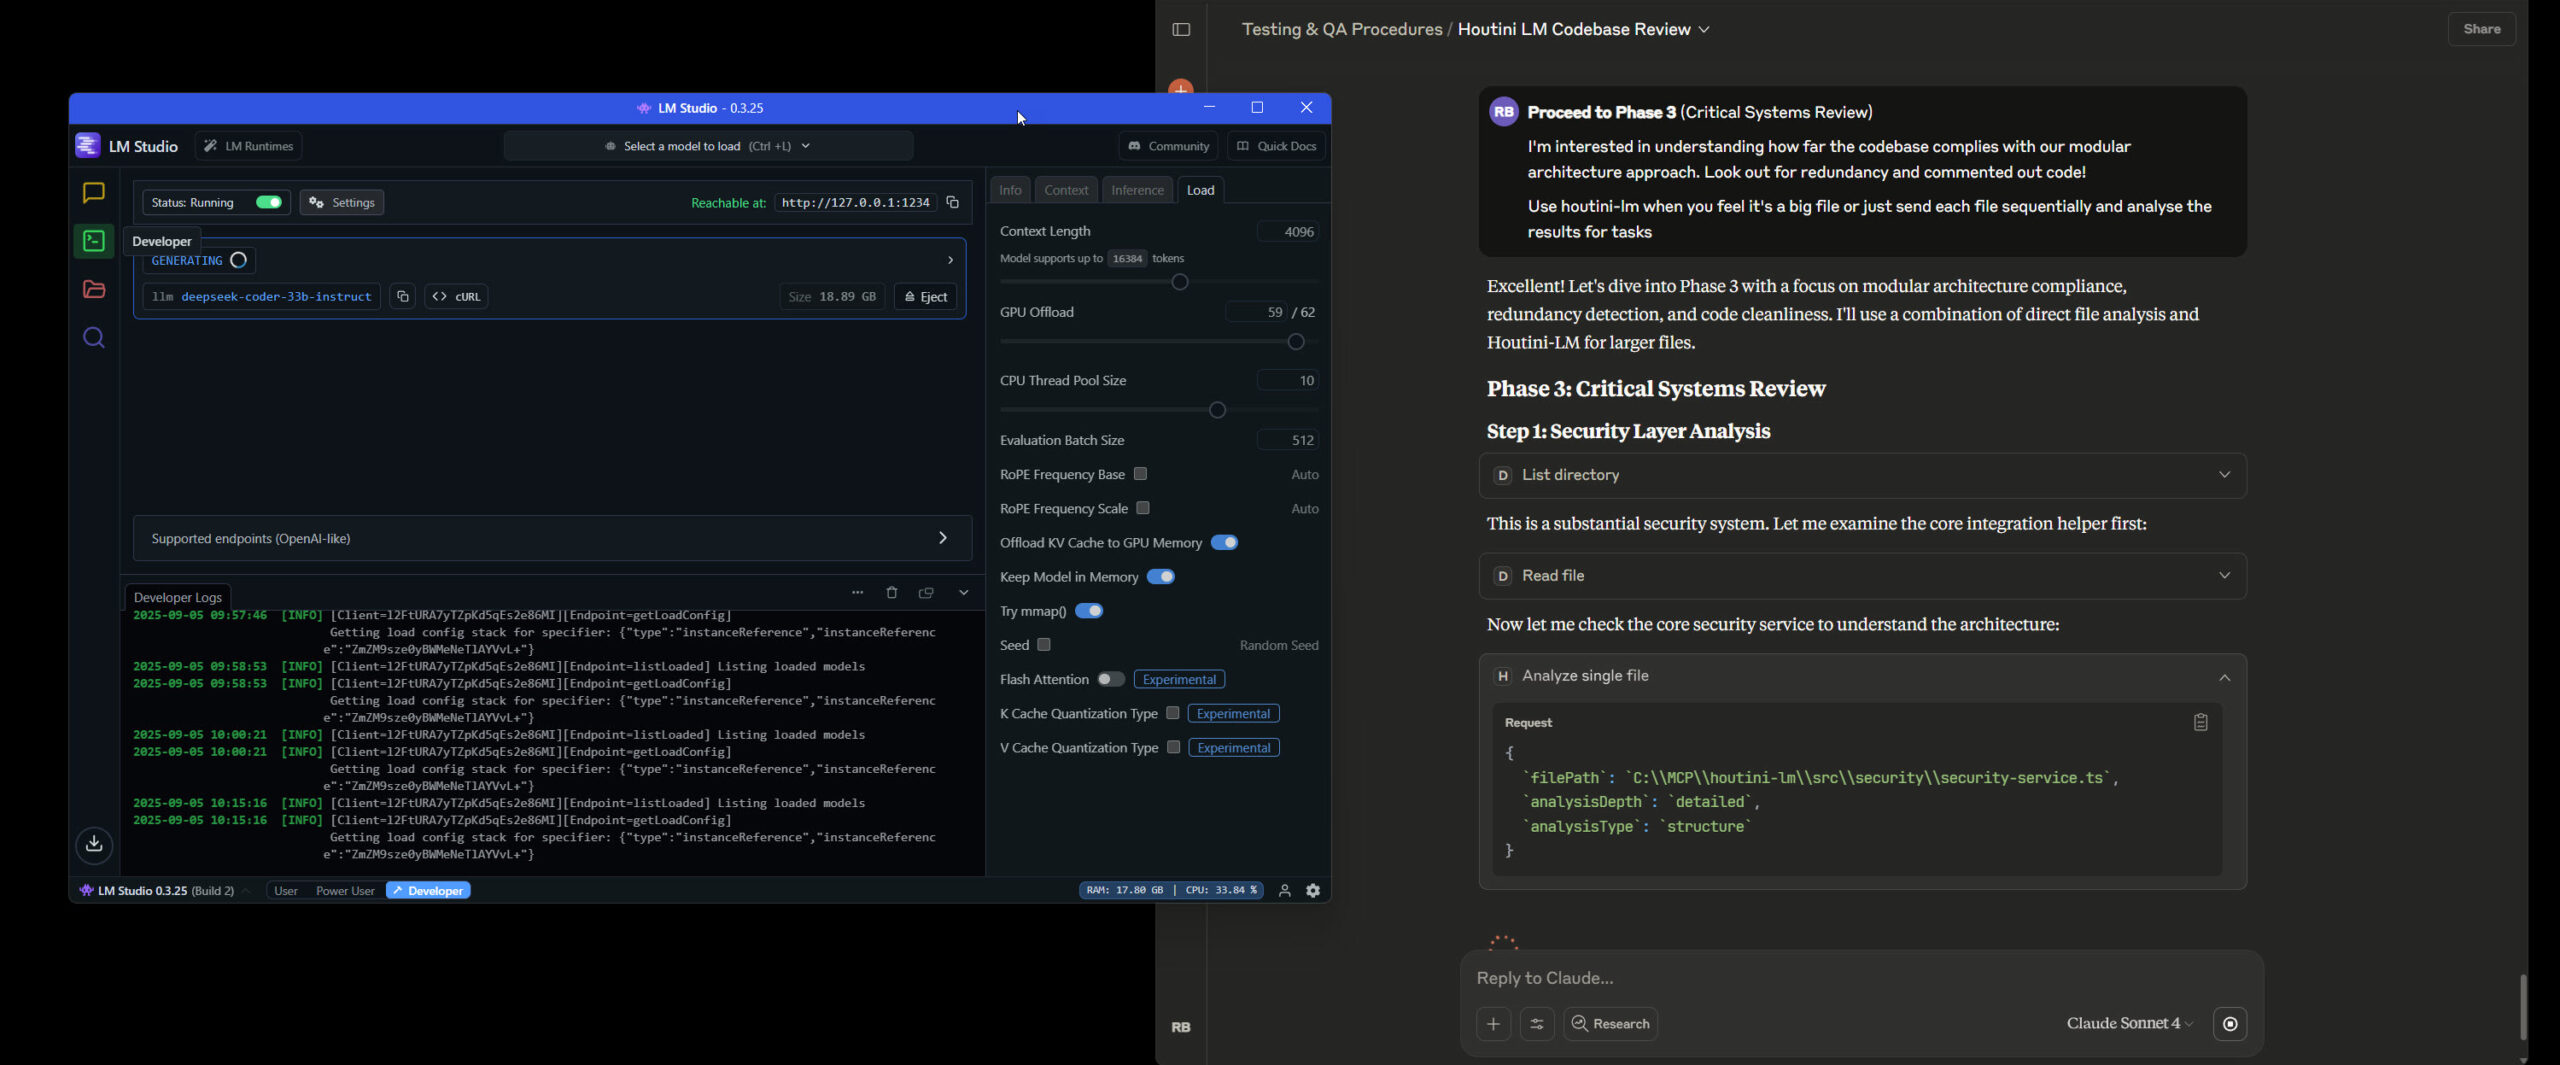
Review Code Quality
local-llm:analyze_single_file filePath="C:/path/to/your/code.js" analysisDepth="comprehensive"Get expert-level code review with security insights, performance suggestions, and refactoring opportunities.
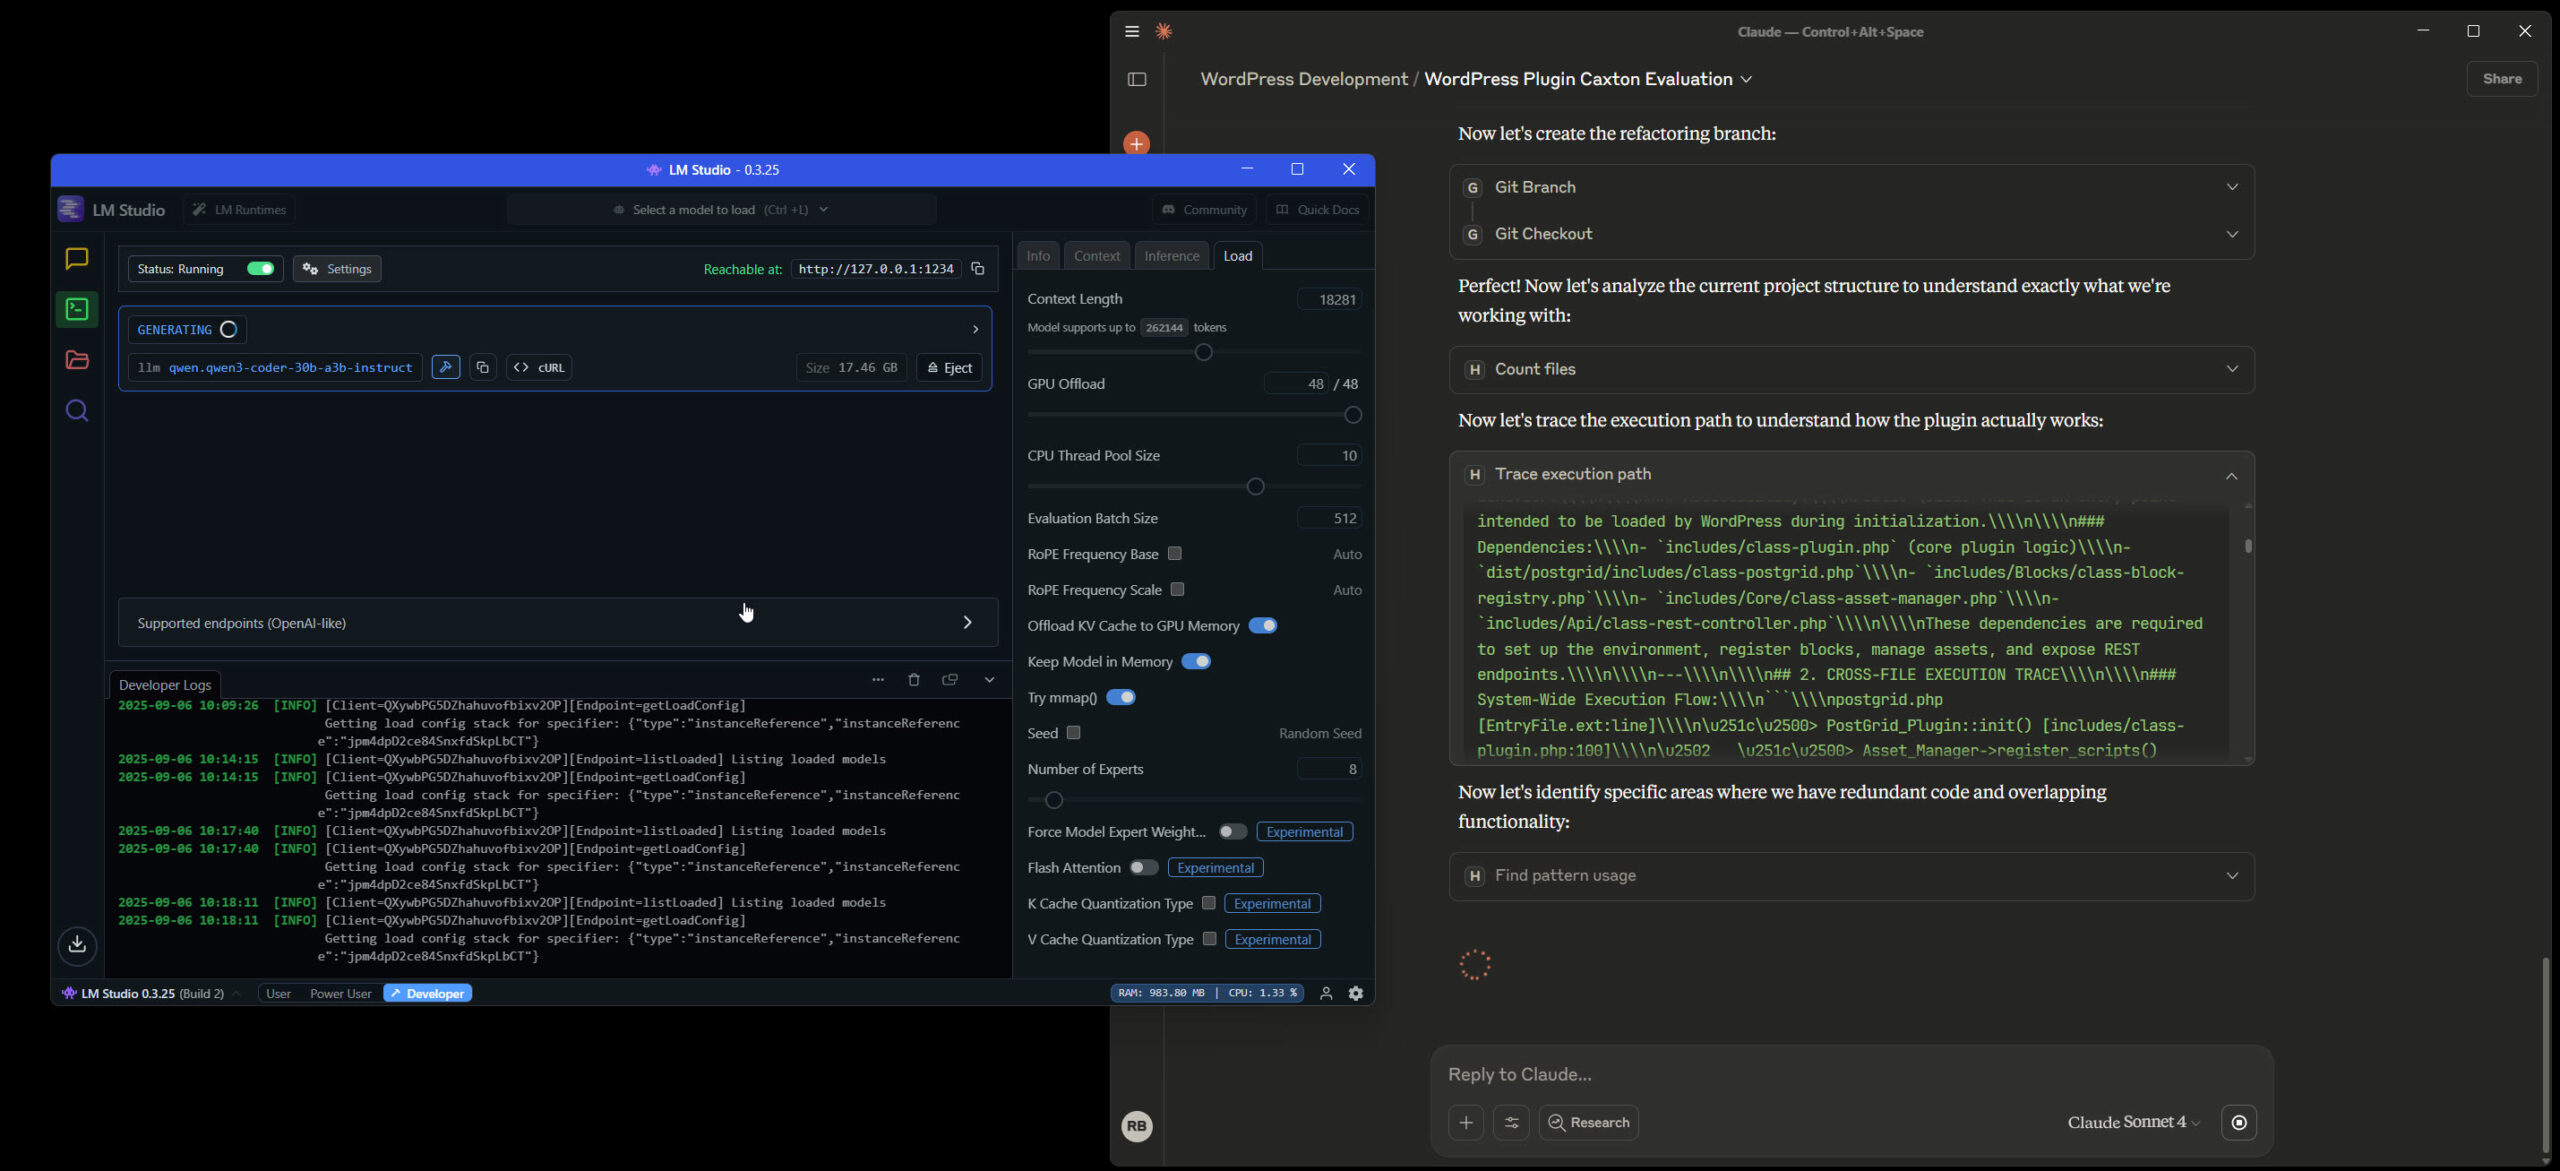
Real-World Example: WordPress Plugin Security Audit
Here’s how powerful this setup becomes for real development work:
With one command, you get:
- Security vulnerability detection
- OWASP Top 10 compliance checking
- WordPress-specific security patterns
- Actionable remediation steps
Advanced Workflows: The Perfect Partnership
Once you’re comfortable, try these powerful workflow patterns:
Pattern 1: Project Assessment
1. local-llm:count_files → Get project overview
2. local-llm:security_audit → Identify vulnerabilities
3. Claude: Strategic planning based on findings
4. local-llm:generate_unit_tests → Create test suites
5. Desktop Commander: Write files to disk
Pattern 2: Code Quality Pipeline
1. local-llm:analyze_single_file → Quality assessment
2. local-llm:suggest_refactoring → Improvement recommendations
3. local-llm:generate_unit_tests → Test coverage
4. Desktop Commander: Write improved code to files
Pattern 3: CSS and Frontend Cleanup
1. local-llm:find_unused_css → Identify unused styles
2. local-llm:find_pattern_usage → Find specific patterns
3. Claude: Strategic decisions on what to remove
4. Desktop Commander: Clean up files
Troubleshooting Common Issues
LM Studio Won’t Connect
- Ensure LM Studio server is running (localhost:1234)
- Check your model is loaded and ready
- Try restarting LM Studio
- Verify no firewall is blocking localhost connections
File Access Denied
- Check your LLM_MCP_ALLOWED_DIRS environment variable
- Use absolute paths (C:\dev\project, not .\project)
- Ensure the directory exists and you have read permissions
- Restart Claude Desktop after changing environment variables
Poor Analysis Quality
- Try a larger model (32B+ parameters for best results)
- Increase analysisDepth to “comprehensive”
- Add specific context in your commands
- Ensure your model is fully loaded (not just downloaded)
What’s Next?
You’re now equipped with a powerful local AI development assistant! Here’s how to get the most value:
- Daily Integration: Start each coding session with a project overview
- Code Reviews: Run analysis before committing changes
- Security First: Regular security audits catch issues early
- Learn by Exploring: Try different analysis depths and functions
Explore Our Function Library: Houtini LM includes 50+ functions for analysis, generation, and creative coding. Browse the complete function reference to discover advanced capabilities.
Join the Community: Share your workflows and get help from other developers using local AI for development productivity.
The Bottom Line
You now have unlimited AI analysis running locally. Use it for the detailed work—code reviews, security audits, project analysis—while saving Claude for strategic thinking and complex problem-solving. This partnership multiplies your development productivity without multiplying your API costs.
Happy coding! Your local AI assistant is ready to help you build amazing things.